-

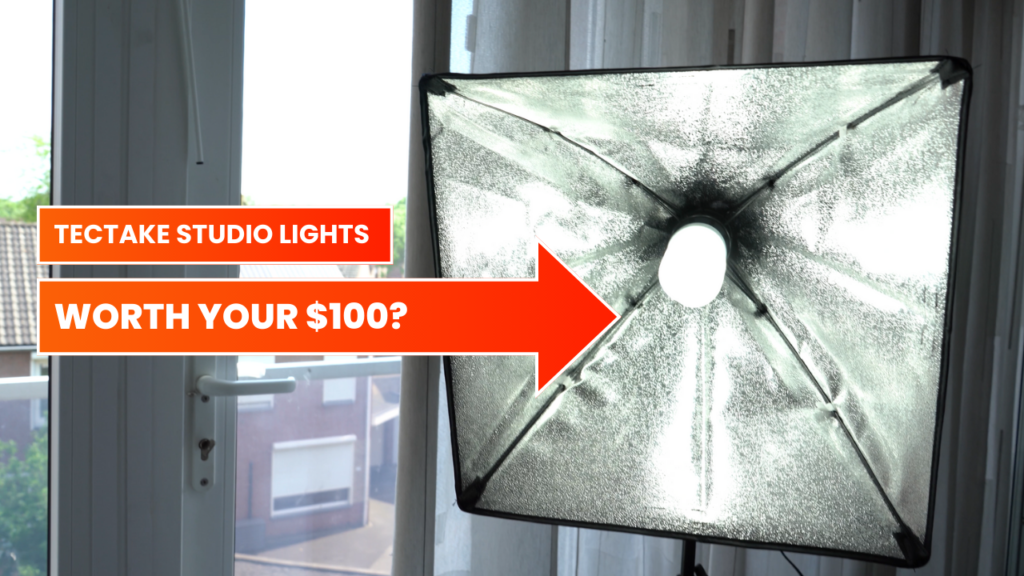
Tectake Studio Lights Review: Shedding Light on Budget-Friendly Illumination
Welcome back to Endalon Studios! Today, we’re delving into the realm of lighting with our review of the Tectake Studio Lights. Join us as we uncover the truth about these budget-friendly illuminators and whether they’re worth your hard-earned cash.
This article serves as a companion to our YouTube short.
investigation: Unveiling the Mystery
But wait… Before we dive in, let’s address the elephant in the room. These lights initially came to us (€94,95) with a veil of mystery, lacking any discernible brand. However, through some sleuthing and investigative prowess, we uncovered their true identity: Tectake Studio Lights, Product ID 400894 (€140,90 wow!) Now that we’ve cleared that up, let’s shed some light on what these babies have to offer.
Unpacking the Goodies
At first glance, the Tectake Studio Lights may seem like a steal, boasting a modest 4.3/5 rating from a handful of reviews with an affordable price on bol.com. But are they truly worth the investment?
Inside the box, you’ll find two tripods, each equipped with softboxes and lamps, along with a single gallows tripod featuring its own softbox and lamp. Additionally, the package includes ballast bags for added stability, though the absence of weights is a slight downside. Fear not, though; a couple of improvised items can serve as makeshift solutions. Oh, and let’s not forget the convenient carry bag for easy transport.
Ease of Setup
Setting up these lights is a breeze, which might also be a downside, requiring just a few simple steps to get you ready to illuminate your creative space in no time.
Impressive Illumination
With each light boasting a respectable 50 watts and a color temperature of 5500 Kelvin, you can expect impressive results akin to natural daylight. The softboxes effectively diffuse the light, casting soft, flattering shadows for professional-looking shots.
User-Friendly Features
Adjustable height? Check. Easy setup? Double check. These lights are undeniably user-friendly, making them ideal for beginners in a small studio.
Word of Caution
However, before you rush to add these lights to your cart, there are a few caveats to consider. Some users have reported concerns regarding the lights’ durability, with mounting poles that feel somewhat flimsy. Attempting to extend them to their maximum height of 350cm may leave you feeling like you’re playing a precarious game of Jenga. Additionally, the cords could use a few extra inches for added convenience.
The Verdict
So, are the Tectake Studio Lights worth it? If you’re operating on a tight budget and in need of basic illumination, then they might just fit the bill. However, if you’re seeking professional-grade equipment or prioritizing safety and durability, you may want to explore other options.
Our Experience
Despite their shortcomings, we’ve incorporated these lights into our own studio setup due to lighting budget constraints. While they serve their purpose for now, we acknowledge their limitations and recommend exercising caution during use, and we don’t mean that lightly; these things can and will fall over.
Conclusion
In conclusion, we’ve laid out the facts, but the ultimate decision rests with you, dear reader. Whether you opt for the Tectake Studio Lights or venture elsewhere, keep creating and shining bright!
Where to get them
We have purchased these lights at bol.com, and we also found the official website, and an Amazon link.
SUPPORT US
Did you find this article helpful? Join our Patreon community to unlock exclusive rewards. Your support fuels the creation of valuable resources like this one and helps us continue to pursue our goals. Together, we can continue our mission to help individuals realize their goals and projects through a combination of tutorials, online courses, and entertaining videos.
Do you want to talk with like-minded people? Join our Discord.
Have any questions? Feel free to email us at [email protected].
-
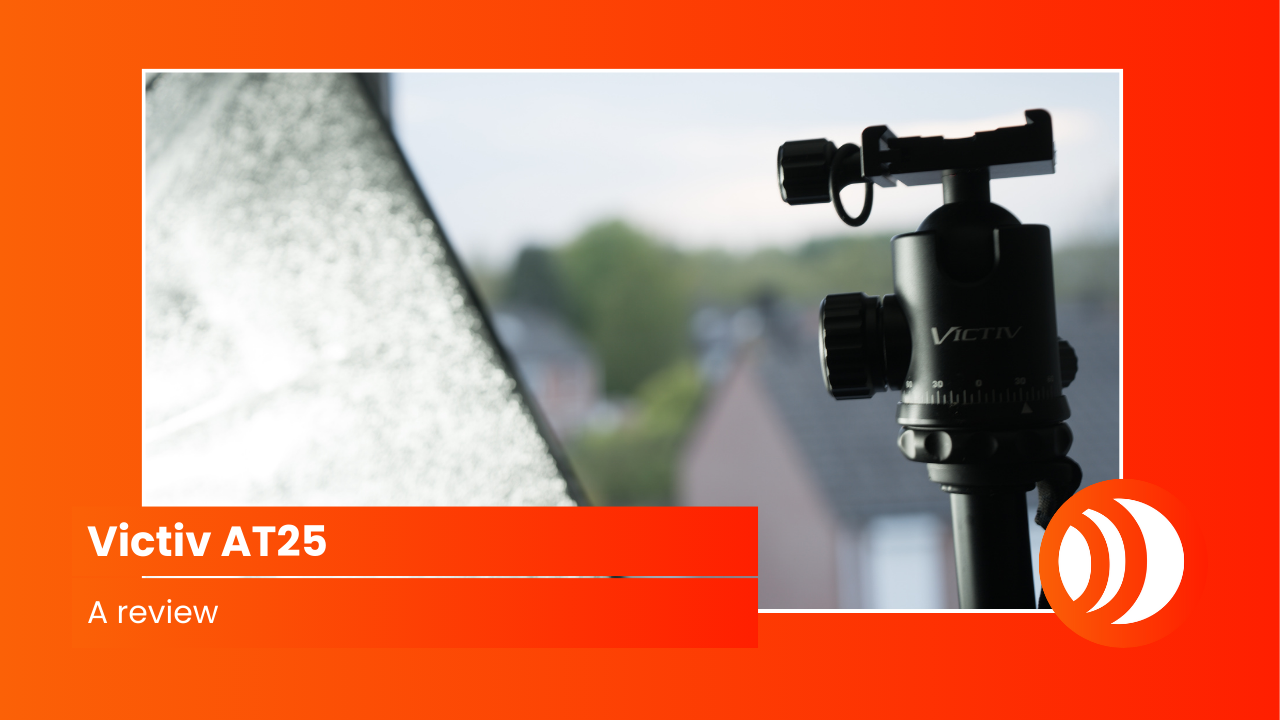
Under $100: Victiv AT25 Camera Tripod – The Perfect Companion for Content Creation

Hey there fellow content creators! Today, we’re excited to share our review on the Victiv AT25 Camera Tripod – a sturdy, versatile, and budget-friendly tripod that has recently become our go-to companion for all our camera adventures. Not everything has to be expensive; so, let’s dive right in and explore why this tripod might just be the perfect match for your camera as well.
View our short video review instead above.
Stability and Versatility
First things first, let’s talk about stability. The Victiv AT25 boasts an impressive height of over 2 meters and a weight capacity of up to 10 kilograms, making it suitable for a wide range of shooting scenarios. Whether you’re capturing breathtaking landscapes or filming dynamic vlogs, this tripod provides the stability and flexibility you need to get the perfect shot every time.
Adjustable Features
One of the standout features of the Victiv AT25 is its adjustable height range, which extends from roughly 60cm to over 2 meters. With four flip locks per leg, making quick adjustments on the go is a breeze. Plus, the reversible central column allows for low-angle photography, opening up a world of creative possibilities.
Durability and Affordability
Despite its affordable price tag, the Victiv AT25 doesn’t compromise on durability. Thick leg tubes, rubber feet, and a metal spike ensure a solid foundation for your camera setup, while the ¼ inch screw head accommodates a wide range of devices, from webcams to cameras to projectors. And if you can believe it, you can even mount a lightweight telescope to it for some stargazing action!

An excerpt from the Victiv’s website.
Transformative Design
Need even more flexibility? No problem. With just a few simple adjustments, you can transform the Victiv AT25 into a full-size monopod in seconds. Whether you’re shooting handheld or need a trekking pole while hiking, this tripod has you covered. And when it’s time to pack up and move on to your next location, the compact design ensures easy portability.
Where to get it
We have purchased this tripod directly via Amazon. Victiv has an official website that you can find here.
Conclusion
If you’re in the market for a reliable and versatile tripod, look no further than the Victiv AT25. It’s the first tripod we ever bought. Despite our initial fears of our tripod budget being too low: with its sturdy construction, adjustable features, affordability, and compact design made it the perfect companion for us. We have no worries that we made the wrong purchase.
Happy shooting!
SUPPORT US ON PATREON FOR MORE CONTENT
Did you find this article helpful? Join our Patreon community to unlock exclusive rewards. Your support fuels the creation of valuable resources like this one and helps us continue to pursue our goals. Together, we can continue our mission to help individuals realize their goals and projects through a combination of tutorials, online courses, and entertaining videos.
-

Automating Business Partnerships: Utilizing Google Places API

In the world of business, partnerships are often the key to success. Whether it’s collaborating with nearby businesses for mutual benefit or reaching out to potential allies in the market, the process of identifying and connecting with partners can be both time-consuming and prone to errors. However, with the advent of technology and the availability of powerful APIs, this task can now be streamlined and automated, saving valuable time and resources.
This article serves as a companion to our YouTube short.
Overview
At Endalon, we recently embarked on a mission to compile a comprehensive list of nearby businesses for potential partnerships. At first this involved manually scouring through Google Maps search results, extracting relevant information, and painstakingly inputting it into spreadsheets. Needless to say this method was not only tedious but also susceptible to mistakes, particularly when dealing with phone numbers and emails in large volumes.
About Google’s APIs
Fortunately we are programmers and remembered the existence of one gem: Google’s API, specifically Google’s Places API. This powerful API provides access to a wealth of business information, including contact details, addresses, and customer reviews, all with just a few lines of code. By leveraging this API, we were able to automate the process of gathering business data, significantly reducing the time and effort required (if you think getting a program to work isn’t a lot of time and effort).
Implementing the Google Places API into our workflow was surprisingly straightforward. Armed with a Google API, to which Google provides a generous allowance of $200 free usage every month, we were able to access and retrieve the data we needed.

The beauty of the Google Places API lies in its versatility. Depending on your preferences and technical capabilities, there are various ways to integrate it into your workflow. For instance, we opted to develop a custom program using C# and the Google API Framework. This allowed us to create a tailored solution that seamlessly converted the retrieved data into a .CSV file, compatible with Excel—a popular choice for managing business information.
Implementation
To illustrate how straightforward the implementation process can be for programmers using C#. For convenience we have leveraged this Google API Nuget Package to handle the API requests (big thanks to who made this!) Here’s a basic snippet of code we wrote to set up our application:
using GoogleApi;
using GoogleApi.Entities.Common;
using GoogleApi.Entities.Common.Enums;
using GoogleApi.Entities.Places.Common.Enums;
using GoogleApi.Entities.Places.Details.Request;
using GoogleApi.Entities.Places.Search.Common.Enums;
using GoogleApi.Entities.Places.Search.NearBy.Request;

// Assign an API key
var apiKey = "{YOUR_API_KEY_HERE}";

// Create a file to write the csv data to
await using var writer = new StreamWriter("results.csv");

// We use quotation marks here to ensure that the values aren't accidentally translated into separate fields
writer.WriteLine("\"Name\",\"Type\",\"FormattedAddress\",\"Website\",\"FormattedPhoneNumber\"");

// Create a request to find all electronic stores close to Maastricht in a radius of 5KM
var nearbyPlacesRequest = new PlacesNearBySearchRequest
{
 Location = new Coordinate(50.851817192973236, 5.692010360004194),
 Radius = 5 * 1000,
 Type = SearchPlaceType.ElectronicsStore,
 Key = apiKey
};

// Send the request and store all the nearby place
var allNearbyPlaces = await GooglePlaces.Search.NearBySearch.QueryAsync(nearbyPlacesRequest);

// For each place we found we need to make another request to get the information
foreach (var business in allNearbyPlaces.Results)
{

 // Create a "GetDetailsRequest" and specify the details we want
 var placeDetailsRequest = new PlacesDetailsRequest
 {
  Key = apiKey,
  PlaceId = business.PlaceId,
  Language = Language.Dutch,
  Fields = FieldTypes.Website | FieldTypes.Formatted_Address | FieldTypes.Name |
           FieldTypes.Formatted_Phone_Number
 };

 // Send the request and store the details
 var placeDetails = await GooglePlaces.Details.QueryAsync(placeDetailsRequest);

 // Write all of the details in order to the CSV file
 writer.WriteLine(
  $"\"{placeDetails.Result.Name}\",\"{nearbyPlacesRequest.Type}\",\"{placeDetails.Result.FormattedAddress}\",\"{placeDetails.Result.Website}\",\"{placeDetails.Result.FormattedPhoneNumber}\"");
}
Conclusion
In this article we have wanted to show you our process of utilizing the Google API to automate our work.
SUPPORT US
Did you find this article helpful? Join our Patreon community to unlock exclusive rewards. Your support fuels the creation of valuable resources like this one and helps us continue to pursue our goals. Together, we can continue our mission to help individuals realize their goals and projects through a combination of tutorials, online courses, and entertaining videos.
Do you want to talk with like-minded people? Join our Discord.
Have any questions? Feel free to email us at [email protected].
-

A tip: How to download and backup Your Facebook Videos

If you recently uploaded your own video to Facebook but can’t find a way to download it back to your computer don’t fret! As of right now Facebook’s mobile site ‘mbasic’ is a stripped-down, simplified version of Facebook optimized for basic mobile devices with limited resources and internet connectivity. Within it you can access and download your videos for offline use.
This article serves as a companion to our YouTube short which shows you how to quickly download your video from Facebook.
Here’s how you can do it in just a few easy steps:
When you are on the page of a video you want to download head over to your URL bar.

Replace “www.” with “mbasic.” but leave the rest of the URL untouched.

Navigate to this new URL by pressing Enter.

Click your video.

(**) Right click “Save As”
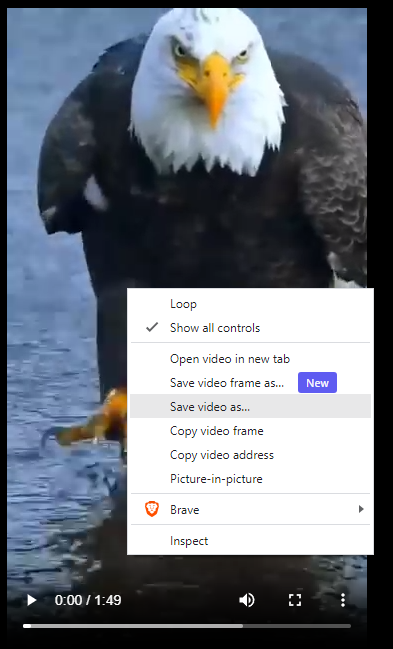
And there you have it – a quick and easy way to download your Facebook videos using Facebook’s ‘mbasic’ site.
** The legality of downloading videos from Facebook depends on copyright laws and Facebook’s terms of service. In most cases, downloading videos without permission may violate copyright and Facebook’s policies. Exceptions may exist for videos with Creative Commons licenses or other permissions. It’s important to consider the legal and ethical implications and seek permission before downloading or sharing videos from Facebook.
Conclusion
In this guide, we’ve explored the simple process of wirelessly connecting your Windows computer to a smart TV. After finishing this article you can now share your favorite content with friends and family on the big screen.
SUPPORT US ON PATREON FOR MORE CONTENT
Did you find this article helpful? Join our Patreon community to unlock exclusive rewards. Your support fuels the creation of valuable resources like this one and helps us continue to pursue our goals. Together, we can continue our mission to help individuals realize their goals and projects through a combination of tutorials, online courses, and entertaining videos.
-
Use Smart TV As A Monitor On Windows Computer

When we come together with friends and family, sharing the wonders of the internet is a natural tendency. While some still adhere to traditional TV viewing, modern smart TVs offer a convenient solution to bridge the digital and analog worlds.
In the past, connecting a computer to a TV required lengthy cables, but with the rise of smart TVs supporting technologies such as Miracast this process has become more streamlined. Furthermore, most modern Windows versions include built-in support for this technology too, making it even easier to set up.
This article serves as a companion to our YouTube video, providing an entertaining and quick video of connecting your Windows computer to a compatible smart TV.
Setup
Before proceeding ensure you have a compatible Windows computer and Smart TV.
Your Windows computer must support Wireless Display. Miracast was introduced to Windows 8.1, so any version of Windows 8.1 and up should meet this requirement out of the box.
Your Smart TV must support screen mirroring through a technology such as Miracast. Alternatively you can purchase a Miracast wireless display adapter that connects to an HDMI port on your TV.
Both your computer and your smart TV must also be connected to the same wireless network in order for the devices to become discoverable to each other.
Connecting to your Tv
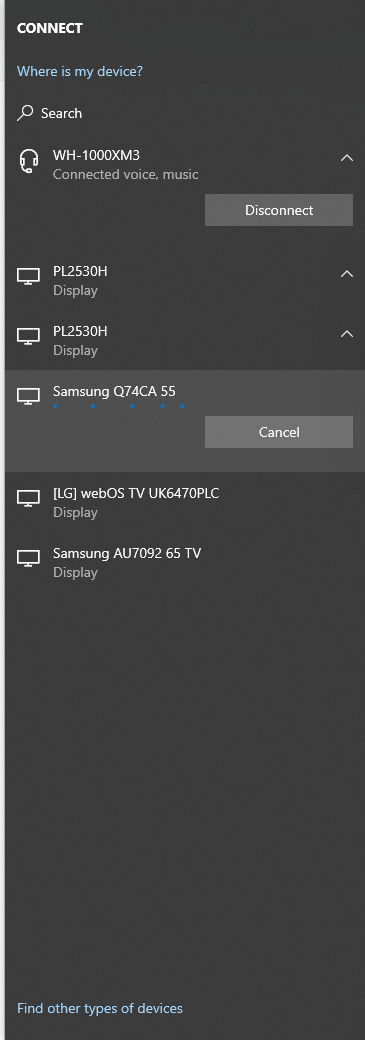
Open the Windows start menu by pressing the Windows key or clicking the Windows Start button on the left hand side of your taskbar.
Search for “Connect to a wireless display” and select the result from system settings.

In the newly opened window under ‘Multiple displays’ click “Connect to a wireless display” written in blue.

Note: If this option is grayed out or missing you may need to follow the ‘troubleshooting‘ section of this article.
On the right-hand side of the screen, select your TV to initiate the connection.
And that’s it! You have now successfully connected to your TV and can start using it as a remote display. If your connection fails or you do not see your TV listed follow the troubleshooting section below to see if this resolves any connection issues.
Troubleshooting
A lot of issues could arise through the process of setting up and connecting your smart TV as a remote display. We have summarized the three most important solutions to a lot of problems we have personally encountered. If none of our troubleshooting steps help resolve your issue you could always browse through the official Microsoft website or seek help from others on forums online.
Software issues
Sometimes, a simple restart can resolve connectivity issues. Turn off both your computer and smart TV, then power them back on after a few minutes.
Driver issues
Ensure your computer’s graphics and network drivers are up to date. Outdated drivers can hinder wireless display functionality. Visit the manufacturer’s website to download and install the latest drivers for your graphics card.
Firewall issues
Windows Firewall might be blocking the connection between your computer and the TV. To allow this connection to take place through Windows firewall open your start menu and search for ‘allow firewall’, then select ‘Allow an app through Windows Firewall’ from the list of results. Under Name, find Wireless Display, make sure Private and Public are selected, then select OK.
Other
If you encounter any other common issues during setup and have a solution, please let us know in the comments below! We would love to add them to the article to help others in the future.
Conclusion
In this guide, we’ve explored the simple process of wirelessly connecting your Windows computer to a smart TV. After finishing this article you can now share your favorite content with friends and family on the big screen.
SUPPORT US ON PATREON FOR MORE CONTENT
Did you find this article helpful? Join our Patreon community to unlock exclusive rewards. Your support fuels the creation of valuable resources like this one and helps us continue to pursue our goals. Together, we can continue our mission to help individuals realize their goals and projects through a combination of tutorials, online courses, and entertaining videos.
-

Sound Design For Beginners: Mechanical Sounds – Exploring Creativity with Automated Drills and Effects

In the world of sound design, things can quickly get complicated with layers upon layers of adjustments to perfect the sounds. But fear not, because there are also simple yet creative techniques that can yield amazing results, especially for beginners. Take, for instance, the humble electric screwdriver. With a bit of creativity and some audio editing tricks, its basic whirring sound can be transformed into something truly unique without the need to grasp the intricacies of synthesization and audio design.
This article complements our YouTube short video, where we show the process of creating our own mechanical sounds.
Introducing the Electric Screwdriver
Imagine a bustling workshop where the steady hum of an electric screwdriver serves as the backdrop for creativity. This everyday tool, often unnoticed, shines and can become the base for many sound design projects. With a good microphone and some creativity you really have all you need to start crafting your very own sound effects.
Enhancing with Effects
In the digital realm you can expand your possibilities with a powerful premium Digital Audio Workstation (DAW.) Free alternatives such as Audacity also exist with enough options for any beginners. With enough knowledge about sound, most tools can get the job done – although some are faster with more flexibility than others.
We have long opted in to purchase FL Studio and Phase Plant (VST Plugin.) Phase Plant is a real gem and our trusty companion. It’s a versatile synthesiser that allows you to manipulate and shape sounds in various ways, such as generating oscillations, applying filters and modulating parameters. Coming from a programmer background it was for us the most intuitive way to start playing with sound. For just a handful of examples of what is possible with synthesization in Phase Plant feel free to check out this page.
Layering
With finesse you can layer the screwdriver’s whirr, pitch-shifting one upwards and one downwards to create a harmonious blend of tones. This process, known as layering, involves stacking multiple sounds on top of each other to create a richer and more complex texture.
Adding Depth with Effects
But why stop there? You can further enhance your creation with the ring modulator, a type of audio effect that produces harmonic and inharmonic overtones by combining the input signal with a carrier signal. This adds a unique and otherworldly quality to your mechanical symphony; enriching its sonic palette.
Final Touches
As your sound takes shape, you can even add a kick sound with reverb to give it impact. Reverb is an effect that simulates the reverberation of sound in physical spaces, adding a sense of space and depth to the sound. You might just know this as ‘echo.’
Use a 3-band equalizer to sculpt the frequencies of the kick, balancing the highs, mids and lows to achieve a pleasing tonal balance.
The Result
Behold, a mesmerizing mechanical sound born from the simple whirr of an electric screwdriver and the magic of effects. In this realm complexity gives way to simplicity and the joy of creation knows no bounds.
Conclusion
Sound design may seem daunting in some aspects, but it can also be a simple, creative and endlessly enjoyable pursuit. So, pick up your tools, unleash your imagination and let the symphony of mechanical wonders begin.
Support us on Patreon for more content
Did you find this article helpful? Join our Patreon community to unlock exclusive rewards, including a free license for all our new releases on our online marketplace endalon.com. Consider checking that out!
Your support, as well as bringing awareness to our content by sharing it, fuels the creation of valuable resources like this one and helps us pursue our goals. Together, we can continue our mission to help individuals realize their goals and projects through a combination of knowledge and digital assets.
-
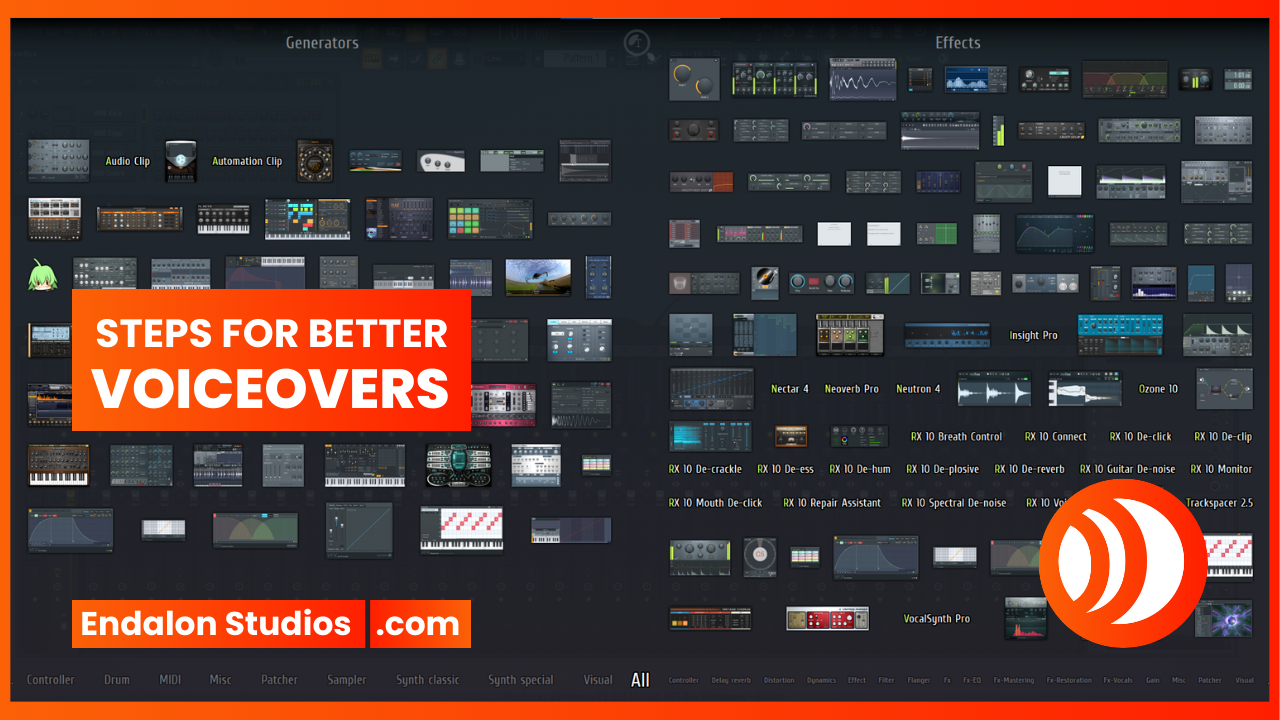
Essential steps to maximize the quality of voice recordings

Capturing high-quality voice recordings is essential for various audio projects, whether it’s podcasts, voiceovers, or music production. Achieving optimal results involves a strategic approach that encompasses hardware settings, recording techniques and post-processing using plugins. In this guide, we’ll walk you through the process to maximize the quality of your voice recordings.
This article complements our YouTube short video, where we outline the basic steps for improving voice recording quality. Here, we delve deeper into each step, providing more detail and reasoning behind the process.
1. Setting up your hardware and operating system
Begin by configuring your hardware and operating system settings for optimal recording quality. This includes selecting the appropriate sample rate and bit depth. A sample rate of 48000 Hz (48 kHz) and bit-rate of 24-bit are recommended. Higher sample and bit-rate settings ensure better audio fidelity but may require more system resources to produce and process.
Note: Your recording device, operating system, or drivers may impose limitations on the settings you can apply.
2. Configuring your digital audio workstation (DAW)
Ensure your DAW’s audio recording settings align with your previously selected sample rate and bit depth. Always maintain consistency in these settings. This eliminates discrepancies between your operating system and DAW, ensuring seamless recording, playback and rendering, without conversion losses and other issues.
3. Recording environment optimization
Minimizing noise of any kind is crucial for achieving high quality and professional sounding recordings. This starts by addressing the problems in the recording environment. Post-processing should always be done minimally and as a last resort to mitigate artifacts and noise related issues, so as to not affect the quality of the original sound.
Soundproofing Techniques:
Optimizing your recording environment involves soundproofing techniques to minimize external noise and ensure cleaner base recordings. Soundproofing methods include: installing acoustic panels or foam, sealing gaps and cracks in your door(s) and windows and using thick, heavy curtains or soundproofing curtains.
Isolating Techniques:
In addition to soundproofing, isolating the recording environment can further enhance the quality of your voice recordings. Isolating techniques include creating dedicated recording booths, using portable vocal booths or reflection filters and using noise-reducing materials like carpets and rugs.
For more detailed information on soundproofing and isolating techniques, stay tuned for our upcoming articles.
Gain settings:
Adjusting your gain is preferably done through a dedicated microphone interface such as a Scarlett Focusrite. Avoid and preferably disable synthetic microphone boosting through the operating system. Microphone boosting within the operating system (not gain or volume) might or might not be available for your device.
Test different gain settings within first the operating system, then the DAW and finally the microphone interface to identify and mitigate any noise or sound leaking issues. Slowly increase each until you get the desired level of gain. While testing the gain levels try to speak as loud as you would within the recording, and as quiet, to identify these optimal levels without risking audio clipping or over-amplifying existing hardware or environmental noise.
Note: Not all audio hardware is made equal. Ensure your issues are not due to low quality or malfunctioning equipment. Sound cables, bad wiring, lack of electrical grounding all are contributing factors as well.
4. Post-processing with VST plugins
Tip: While we use some paid VST plugins within FL Studio, there is software like Audacity which are free alternatives.
Now, let’s explore the post-processing stage by adding VST plugins. These will enhance the overall quality of the recordings.
1. Equalization: By applying an equalizer you can shape the frequency response of your recording. Removing frequencies below 50 Hz and above 20.000 Hz (20 kHz) eliminates unwanted noise that is out of reach for your own voice such as hardware static or heavy bass sounds from traffic. Adjust the EQ settings based on your voice’s characteristics to achieve a balanced and natural sound.
2. Denoising: Utilize denoising plugins such as RX Spectral Denoise to identify any remaining noise while preserving the integrity of the recording. This is where the silent part you’ve recorded comes in handy. The RX Spectral Denoise plugin has a “learn” option. Just select the recorded silence in your DAW, click the “learn” button and let it play. If you notice that the white noise is only in particular ranges of frequencies you can use the reduction curve to apply it more heavily in those regions.
Minimal application is recommended to maintain the original audio quality and avoid artefacts. Your ideal raw recording is completely silent except when you are speaking. This is usually impractical if not outright impossible, nevertheless enhancing the quality of the raw samples should always be your first priority. Post-processing should never be a substitute or bandage for problems within a raw sample. We should know, we once recorded in our bedrooms next to a very busy street with absolutely no sound proofing and the windows open, and proceeded to wonder why more plugins weren’t giving us the quality we were looking for.
3. De-essing: Address hissing issues with a de-esser plugin, which targets and reduces excessive hissing sounds (e.g., “s” and “sh” sounds) in the recording. This plugin effectively smooths out harsh frequencies without affecting the overall tonal balance, resulting in a more polished vocal performance.
4. Noise gating: Implement noise gating to suppress background noise during silent intervals, which is particularly beneficial for podcast-style recordings. By cutting off audio signals below a certain volume threshold, noise gating enhances the clarity and focus of the voice recording.
5. Effects: Experiment with various effects plugins, such as Nectar, to add depth and character to your voice recordings. These plugins offer a wide range of presets and parameters to customize vocal effects, including reverb, delay, modulation and saturation. Selecting appropriate effects enhances the overall sonic texture and emotional impact of the recording, creating a more engaging listening experience. Alternatively you can roll with your own set of plugins, such as another equalizer. Nectar has a great list of presets which could give you a great start to work from.
Note: Pay attention to the changes plugins like Nectar make before you move on to the next step.
6. Compression: Use a compressor to control the dynamic range of the recording and ensure consistent volume levels. Compression helps smooth out peaks and valleys in the audio waveform, improving clarity while maintaining a natural vocal expression.
Bonus tip: Use a decent pair of headphones to ensure that any audio artifacts you may still hear are not coming from your speakers or the environment you are listening in.
Importance of plugin order
The order in which you apply VST plugins during post-processing is crucial for achieving optimal results. Each plugin serves a specific purpose in shaping and enhancing the voice recording, and the sequence of operations significantly impacts the final outcome.
Starting with equalization allows you to address fundamental frequency balance and remove unwanted noise before proceeding to more targeted processes like denoising and de-essing. Applying effects plugins after noise reduction ensures that the desired sonic enhancements are applied to a clean and artifact-free base input.
Compressing the audio at the final stage helps maintain a consistent volume level and further enhances the overall cohesiveness of the recording. By following this systematic approach, you can effectively address various aspects of vocal processing while preserving the integrity and quality of the original performance.
In conclusion, the strategic order of VST plugins plays a vital role in maximizing the quality of voice recordings by addressing specific aspects of processing in a structured manner. Understanding the function and sequence of each plugin allows for precise control over the audio signal, resulting in professional-grade recordings with enhanced clarity, presence, and impact.
Conclusion
By following these essential step-by-steps and leveraging the power of VST plugins, you can significantly enhance the quality of your voice recordings. Each stage of the process, from hardware setup to post-processing, plays a crucial role in achieving professional-grade audio results. Stay tuned for more in-depth articles on individual plugins and techniques to further refine your skills.
Support us on Patreon for more content
Did you find this article helpful? Join our Patreon community to unlock exclusive rewards, including a free license for all our new releases on our online marketplace endalon.com. Consider checking that out!
Your support, as well as bringing awareness to our content by sharing it, fuels the creation of valuable resources like this one and helps us pursue our goals. Together, we can continue our mission to help individuals realize their goals and projects through a combination of knowledge and digital assets.
-

Exploring Animalese – Immersive & Dynamic Dialogues: To Hire or Not to Hire

Attribution: This image is partly sourced from the Animal Crossing: New Horizon video game. The sourced material is utilized for the purpose of illustrating and discussing elements related to the game. All rights and credit for the sourced material belong to the respective copyright owner(s) of the Animal Crossing series.
When brainstorming on the creative journey of game development we always stumble upon the ever recurring dilemma: to hire or not to hire.
Today’s topic: hire a voice actor for dialogue or not?
A great alternative to hiring voice actors, that not only adds a sprinkle of charm to a game but also keeps budgets dancing happily is.. drumroll please.. the “synthesization of dialogue.”
As an example, enter the whimsical universe of Animal Crossing: New Horizons – a game so enchanting it makes you grab your bags and set off to an enchanting uninhabited island to build out a village for yourself and your anthropomorphic friends. Just imagine: the in-game time and seasons sync with the real world, creating a fully immersive experience. It’s like a virtual vacation where events, activities and even the animal villagers’ behaviour change based on the time of day and current season. How insanely cool is that?
The heart of this lovely video game? Animalese; the language spoken by these adorable friends found in the Animal Crossing series, where each letter spoken is matched and synthesized with the basic sound of the letter in the language you chose to play the game in.
Sure, it might lead to a few mispronunciations, but that’s part of the irresistible charm!
Each character has its own distinctive pitch, and when text scrolls swiftly, the rate speeds up, adding an extra layer of delightful madness. Happy villagers speak in higher pitches, spreading joy, while the moody and tough characters speak loooow, spreading a more serious and less enthusiastic vibe. It’s like a symphony of emotions, while retaining immersion of what is an absolutely adorable atmosphere.
Now, how did we go about creating a type of Animalese of our very own? We whipped up a video showcasing just this. By first recording each letter in the alphabet, pairing vowels with a consonant and consonants with a vowel, then merging the results to create a dialogue sounding remarkably similar to that of Animal Crossing.
Tip: If you want to give it a shot yourself speed up the initial development process by downloading using our basic phonetic alphabet sound pack.
So, dear developers, while we haven’t discussed everything in this article and video, we hope that this has given you a taste for what is possible. We highly recommend giving Animal Crossing: New Horizons a whirl for a fresh source of inspiration. A heartfelt “thank you” to Nintendo for gifting us this lovely gem of a game.
And who knows, maybe this topic deserves a follow up in the future. There are endless possibilities with this way of having your video game characters speak irresistibly cutely. Feel free to let us know…
Support our work by becoming a member on our Patreon or buying any of our digital assets on our itch.io or Endalon.com webstore. All contributions go directly to helping us create more and better content just like this.
Disclaimer
We are not affiliated, associated, authorized, endorsed by, or in any way officially connected with Nintendo, or any of its subsidiaries or its affiliates. The official Nintendo website can be found at https://www.nintendo.com.The images used on this website to depict video game content are the property of their respective copyright holders. These images are utilized for the purpose of commentary, criticism, and discussion about the associated video games. The inclusion of these images should not be interpreted as an endorsement or sponsorship by the copyright holders. All trademarks and copyrights pertaining to the depicted video games are acknowledged and remain the exclusive property of their owners.
If you are the copyright holder of an image displayed on this website and believe that its use may not fall under fair use or appropriate licensing, please contact us at [email protected] for prompt removal or proper attribution.